
Content Area: When scrolling through modern interior design and home decor feeds, you have likely noticed a massive shift toward organic, earthy textures. Smooth, glossy, mass-produced decor is stepping aside to make room for rough, matte, stoneware-style ceramics that embrace the beauty of imperfection. These wadi-Sabin inspired pieces—often seen holding delicate olive branches or dried eucalyptus—have become staples of modern minimalist and organic modern homes.
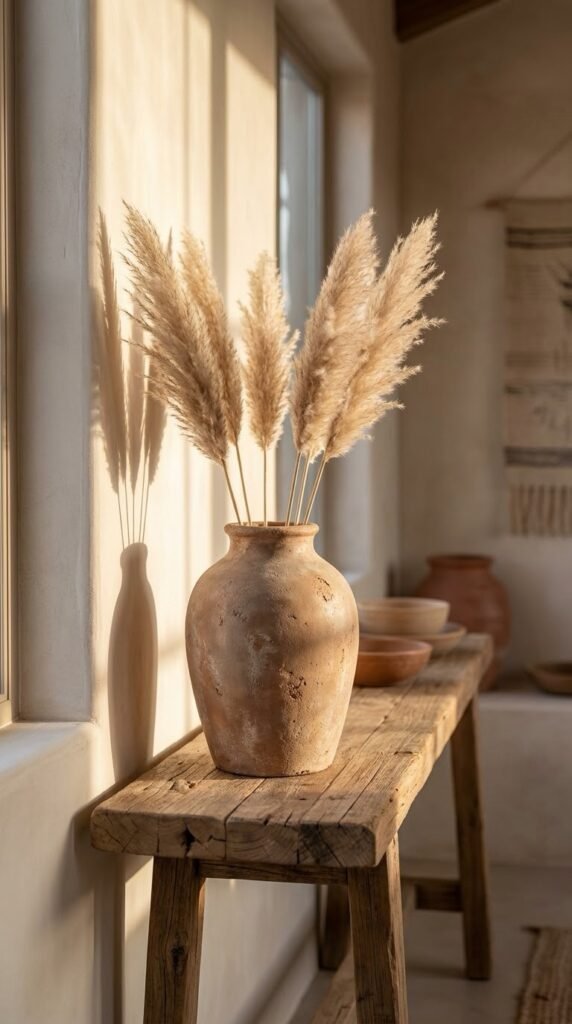
Beyond the aesthetic appeal of these beautiful artisan vessels, styling your home with textured pieces brings a grounding, natural element indoors. However, high-end handcrafted ceramic vases can be incredibly expensive, often costing hundreds of dollars. Fortunately, you do not need a pottery wheel, a kiln, or a massive budget to achieve this coveted look. By utilizing a simple, viral DIY painting technique, you can up-cycle items destined for your recycling bin into stunning statement pieces.
If you want to incorporate bespoke, sustainable decor into your living space, here is a comprehensive guide to mastering the baking soda paint transformation technique safely and effectively.
Understanding the Baking Soda Paint Method Before taking a brush to your old glass jars, it helps to understand why this specific DIY method works so remarkably well. Standard acrylic or latex paint is formulated to dry into a smooth, even, and often slightly glossy finish. However, when you introduce sodium bicarbonate (baking soda) into water-based paint, it fundamentally changes the paint’s consistency.
The fine, powdery grain of the baking soda thickens the paint, transforming it from a liquid into a fluffy, mousse-like paste. When applied to a slick, non-porous surface like glass or plastic, this thickened mixture adheres aggressively and dries into a hard, chalky, matte finish that is virtually indistinguishable from raw, glazed terracotta or fired clay. It is a brilliant optical illusion that turns basic household trash into elevated interior treasure.
What You Will Need
- Glass Vessels: Save your empty pasta sauce jars, pickle jars, or thrift glass vases. Look for interesting shapes with wide bases or unique curves.
- Water-Based Paint: Acrylic craft paint, chalk paint, or leftover interior wall paint works perfectly. Choose earthy, neutral tones like taupe, terracotta, sage green, or warm beige.
- Baking Soda: Standard kitchen baking soda (not baking powder).
- A Bristle Brush: A cheap, rough-bristled paintbrush works best for creating deep texture. Avoid smooth sponge brushes.
- A Mixing Bowl and Stick: A disposable cup and a popsicle stick or old spoon for stirring.
Step 1: Prep and Prime Your Canvas Start with a thoroughly cleansed glass jar. Soak the jar in warm, soapy water to remove the paper label and any lingering adhesive. Once dry, wipe the exterior of the glass down with a cotton pad soaked in rubbing alcohol. This removes any invisible oils or fingerprints from the glass, ensuring your paint mixture grips the surface effortlessly without peeling.
Step 2: Mix the Magic Formula In your disposable bowl, pour in your desired amount of paint. The golden rule for the faux-ceramic mixture is a 2:1 ratio—two parts paint to one part baking soda. Slowly sprinkle the baking soda into the paint while stirring continuously. You want the consistency to resemble thick cake frosting or whipped butter. If it is too runny, add a pinch more baking soda; if it becomes too clumpy to spread, add a few drops of water or extra paint.
Step 3: The First Base Coat
- Dip your bristle brush into the thick mixture and begin applying it to your glass vessel.
- Use long, sweeping horizontal strokes around the circumference of the jar.
- Do not worry if the first coat looks slightly streaky or if a little glass peeks through. The primary goal of this initial layer is to create a textured, grippe base coat for the next layer to hold onto. Let this dry completely (about one to two hours, depending on humidity).
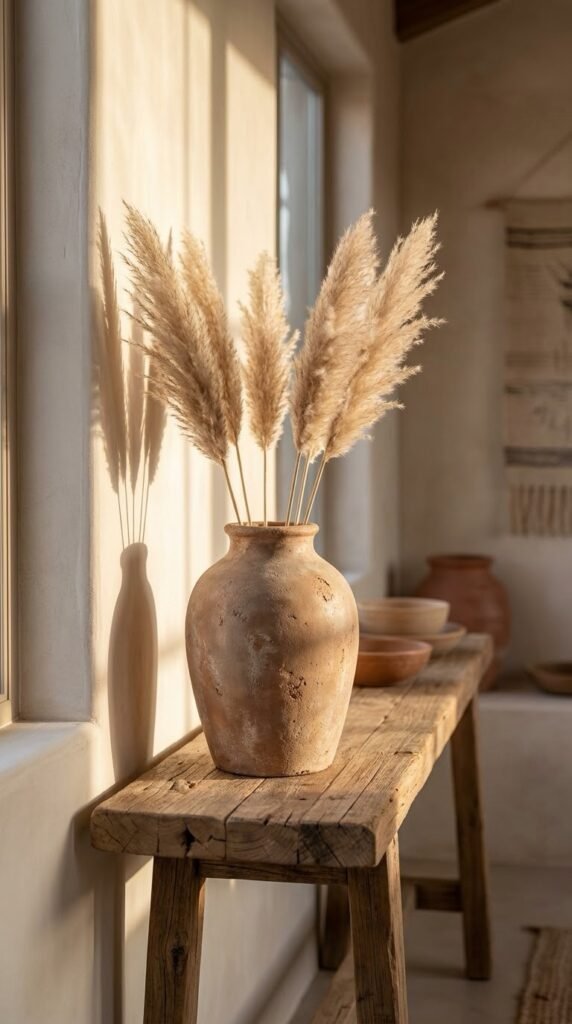
Step 4: Building the Artisan Texture
- Once the first coat is dry to the touch, it is time to build that authentic stoneware look.
- Apply your second coat, but instead of brushing it on in long strokes, use a “stippling” or dabbing motion. Bounce the tip of your heavily loaded brush directly against the glass.
- This creates a raised, porous texture that perfectly mimics the look of rough, sandy clay. Pay extra attention to the rim of the jar to hide the threading where the lid used to sit. Allow this to dry overnight.
Step 5: Styling Your New Masterpiece Because this paint method leaves a porous, matte finish, it is highly susceptible to water spots. These vases are best used for dry styling. Insert a bunch of dried bunny tails, preserved pampas grass, faux olive branches, or dried lavender. Place your new vase on a bookshelf, a coffee table tray, or a bathroom vanity to instantly elevate the space.
Key Rules for Safe Practice
- No Standing Water: Baking soda paint is not waterproof. If you plan to use this for fresh flowers, you must keep the inside of the jar completely free of paint, and carefully seal the painted exterior with a clear, matte waterproof spray sealant.
- Handle with Care: Think of the dried finish like fine chalk; it can scuff if dragged aggressively against hard surfaces. Place felt pads on the bottom of the vase to protect your furniture.
- Experiment Freely: Do not be afraid to mix colors. Blending a dark brown base with a lighter beige top coat can create a stunning, aged stone effect.
The Mindful Takeaway DIY home decor is as much a mental reset as it is a creative outlet. Taking an hour on a quiet weekend afternoon to intentionally craft with your hands provides a wonderful moment of pause. It forces you to disconnect from screens, engage in tactile play, and ultimately leaves you with a beautiful, sustainable piece of art that brings a sense of calm and pride to your home environment.