
The Real-Life Problem:-
Why Rental Bathroom Floors Can Be Difficult to Update?
Renters are frequently stuck with outdated, damaged, or severely unattractive bathroom flooring. They want to upgrade the aesthetics of their space without violating their lease, losing their security deposit, or spending a fortune on permanent renovations.
Introduction:-
Renters look for this because they want a modern, clean bathroom but are restricted by landlord rules against demolition or permanent adhesive. They need temporary, water-resistant solutions.
Realistic Everyday Situation:- You just signed a lease for an apartment with beautiful natural light and a great layout, but you step into the bathroom to find 1980s mustard-yellow linoleum with permanent mystery stains. It instantly ruins the spa-like vibe you wanted to create, leaving you desperate for a fix that won’t get you evicted.
5 Easy Ways to Cover Ugly Rental Bathroom Floors
- Installing interlocking floating vinyl planks for a seamless, glue-free upgrade.
- Custom-cutting a single sheet of vinyl for edge-to-edge waterproof coverage.
- Using the “painter’s tape hack” to safely apply peel-and-stick tiles.
- Laying interlocking teak deck tiles for a modern, breathable spa aesthetic.
- Crucial preparation and removal techniques to guarantee your security deposit is safe.
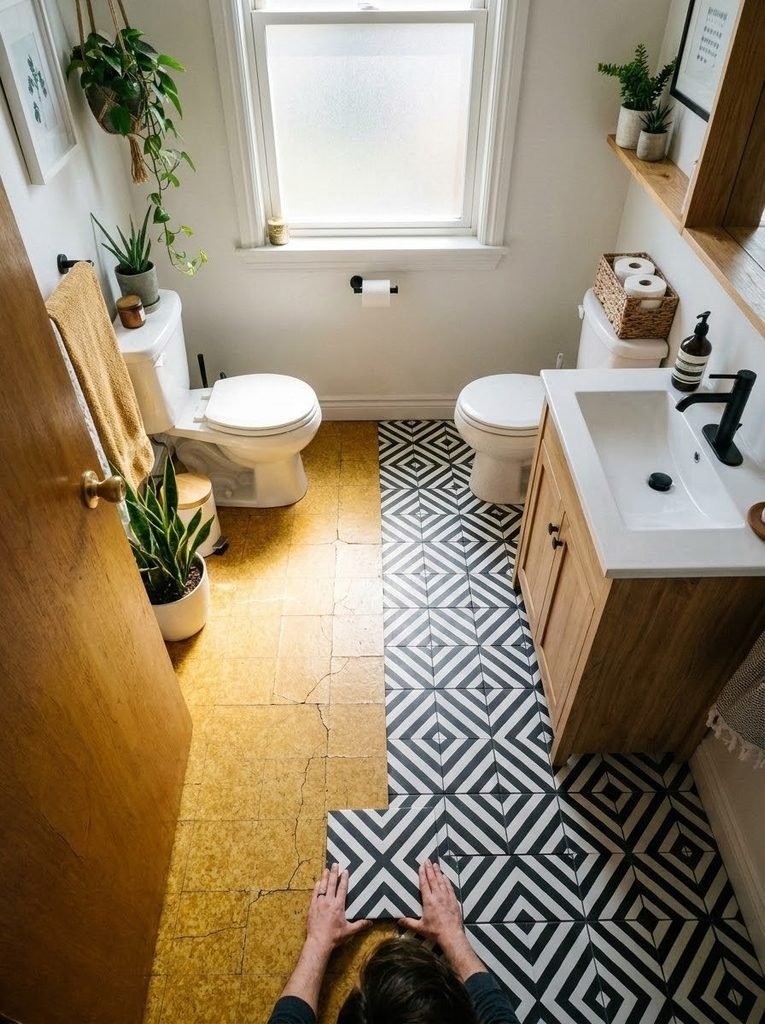
A split view of a bathroom floor showing ugly yellow linoleum being covered by modern black and white geometric temporary flooring.
How to Hide Ugly Rental Bathroom Floors (Waterproof & Deposit-Safe)
Stepping into your otherwise perfect rental apartment only to be greeted by stained, outdated, or clashing bathroom tile is a unique kind of design heartbreak. Bathrooms are meant to be your personal sanctuary, but it is incredibly difficult to relax when you are staring at a floor straight out of a 1970s gas station.
Fortunately, you do not have to live with it, and you certainly do not have to risk your security deposit to fix it. If you need to know how to hide ugly rental bathroom floors, the secret lies in temporary, water-resistant layers that float right over the existing mess.
Today’s renter-friendly materials are thick, durable, and highly realistic. Whether you want the look of natural wood, sleek slate, or vibrant ceramic patterns, you can completely transform your space in a single afternoon. Here are five practical, landlord-approved ways to upgrade your bathroom floor without permanent damage.
1 Snap Together Interlocking Luxury Vinyl Planks
When you want to hide ugly rental bathroom floors with something that feels incredibly sturdy underfoot, interlocking luxury vinyl planks (LVP) are top-tier. These planks feature a click-and-lock system that secures them to one another rather than to the floor beneath them.
Because they “float” over your existing floor, there is zero adhesive involved. This makes them one hundred percent safe for your rental lease. They are also remarkably thick, which means they easily hide the uneven grout lines of the ugly tile hiding underneath.
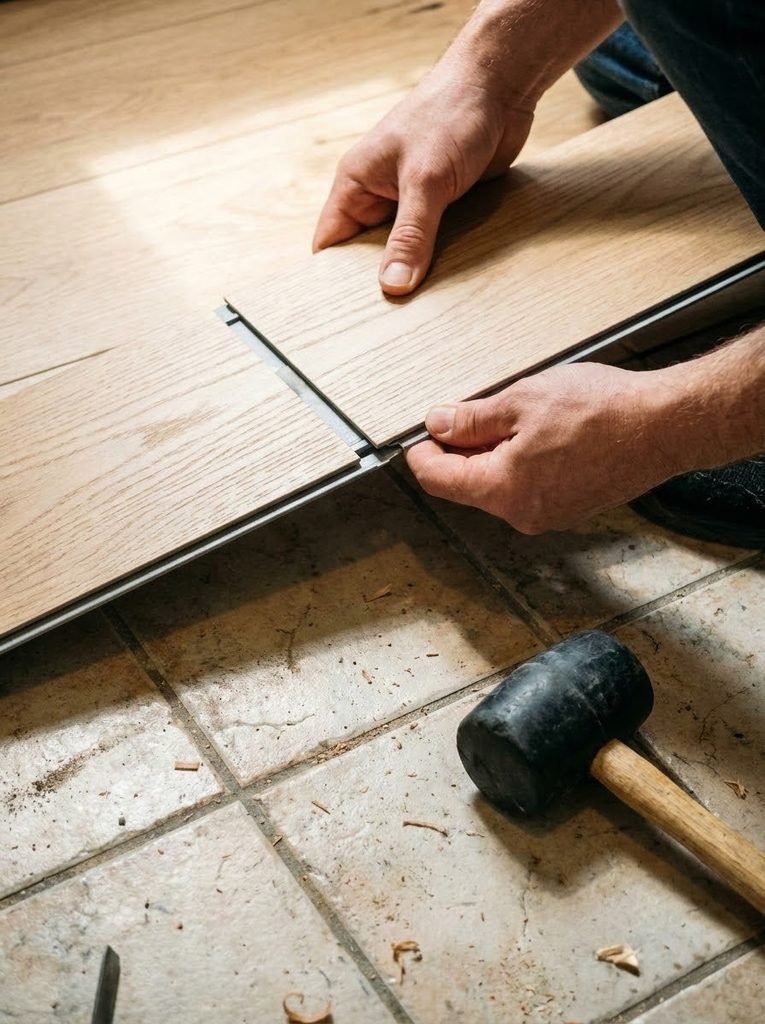
Hands connecting two pieces of interlocking luxury vinyl flooring over old ceramic tiles.
How to Install Floating Planks in a Bathroom
The trickiest part of using LVP in a bathroom is the toilet. You will need a simple profile gauge tool to trace the curved base of the toilet onto your plank before cutting it with a heavy-duty utility knife or jigsaw.
Leave a tiny expansion gap (about 1/4 inch) around the perimeter of the room and the tub. You can cover this gap easily with temporary PVC quarter-round molding attached to the baseboards with double-sided renter’s tape.
Waterproofing Your Floating Floor
While luxury vinyl is inherently waterproof, water can still seep through the microscopic seams or the outer edges if a pipe bursts or a bathtub overflows. To prevent trapped moisture, run a very thin bead of removable silicone caulk along the bathtub edge. When it is time to move out, this caulk simply peels away with a scraper tool
2. Cut a Seamless Sheet of Vinyl Remnant
If you are dealing with a very small bathroom and want maximum waterproofing with minimum effort, sheet vinyl is your best friend. Hardware stores sell sheet vinyl on massive rolls, and you can often buy small, inexpensive “remnants” that are perfect for tight bathroom footprints.
Unlike rigid planks or individual tiles, a single piece of sheet vinyl offers a completely seamless surface. There are no cracks for water, dust, or hair to fall through, making it incredibly easy to mop and maintain.
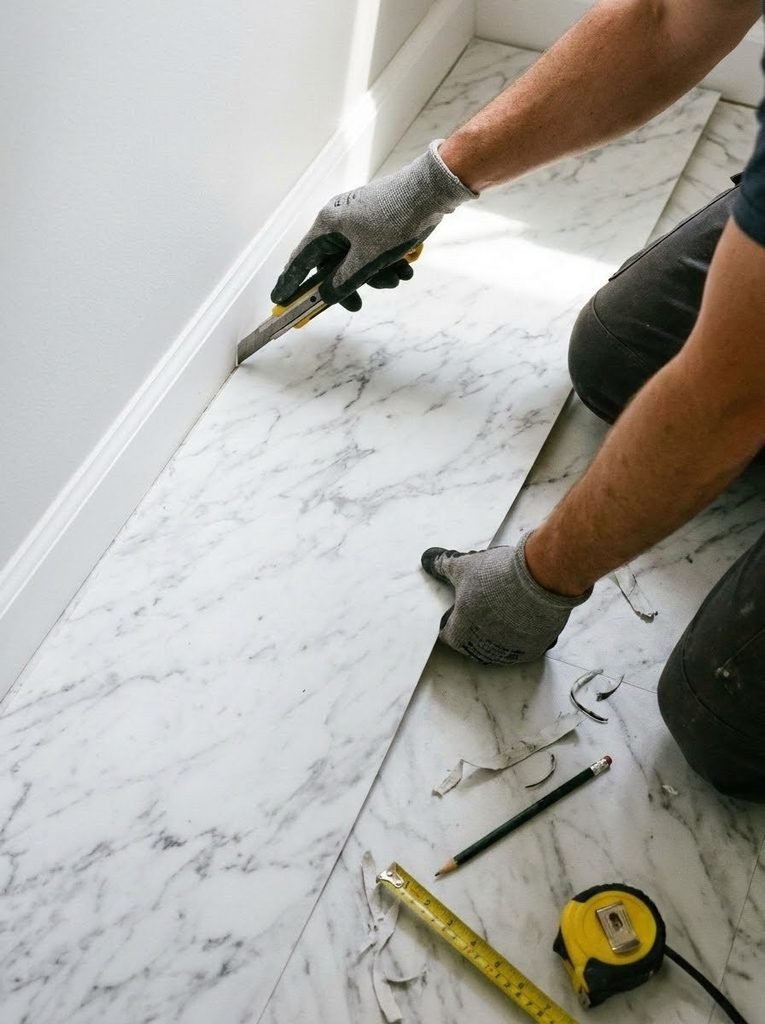
Trimming the edge of a seamless sheet of marble-patterned vinyl to fit a bathroom floor.
Creating the Perfect Template
Do not try to guess the measurements while holding a massive, stiff sheet of vinyl in a cramped bathroom. Instead, use heavy kraft paper or old newspapers and tape them together on your bathroom floor to create an exact template of the room.
Trace around the toilet, the vanity, and the door frame perfectly. Take this paper template into your living room, lay it over your sheet vinyl, and cut out the exact shape using heavy-duty shears.
Securing the Edges
Once you drop your perfectly cut sheet into the bathroom, it should lay relatively flat due to its own weight. To keep it from shifting when you step out of the shower, apply heavy-duty double-sided rug tape exclusively around the perimeter. Avoid taping the center, as less adhesive means a much easier removal process on move-out day.
3. Use the Painter’s Tape Hack for Peel-and-Stick Tiles
Peel-and-stick vinyl tiles are famous for their bold patterns and budget-friendly price tags. However, they come with a hidden danger for renters: the adhesive on the back is notoriously aggressive. If you stick them directly onto old linoleum or cheap builder-grade tile, peeling them up later can leave behind a sticky, impossible-to-remove residue—or worse, rip the finish right off the original floor.
To get the look safely, you need to create a protective barrier. The “painter’s tape hack” is a viral DIY method that solves this exact problem.
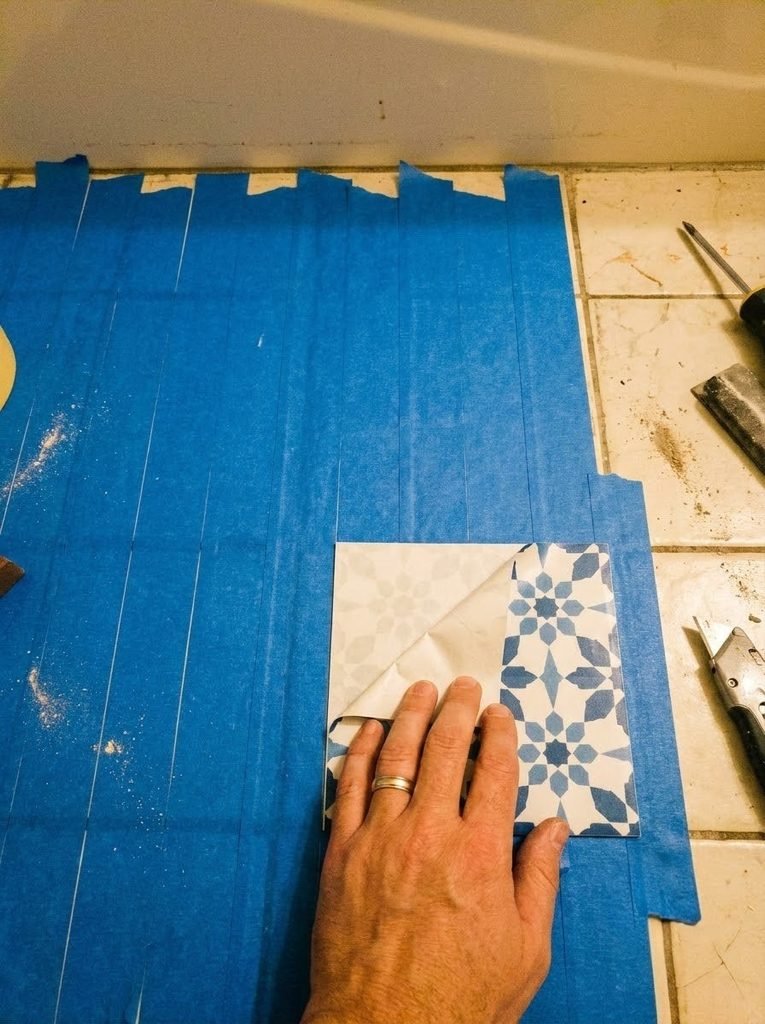
Applying a decorative peel-and-stick vinyl tile over a protective layer of blue painter’s tape.
How the Tape Barrier Works
Before laying a single tile, cover your entire bathroom floor in overlapping strips of high-quality, wide painter’s tape or specialized renter’s floor tape. Smooth the tape down firmly so there are no air bubbles or wrinkles.
Once the floor is entirely blue (or green, depending on your tape), you can confidently stick your vinyl tiles directly onto the tape. The adhesive grips the tape securely, but when your lease is up, the tape peels off the original floor cleanly in long strips.
Troubleshooting Uneven Grout
If your original ugly floor has deep, wide grout lines, standard peel-and-stick tiles will eventually sink into those grooves, creating a wavy, indented look. Choose extra-thick premium vinyl tiles to bridge those gaps, or stick to the interlocking planks mentioned in step one.
4. Drop Down Interlocking Teak Deck Tiles
If you want to bypass vinyl entirely and aim for a high-end, spa-like aesthetic, interlocking wooden deck tiles are an incredible workaround. Originally designed for outdoor patios, these slatted tiles feature a plastic grid base that clicks together effortlessly.
They are incredibly forgiving. Because they sit slightly elevated on their plastic bases, they will easily sit level over cracked, warped, or aggressively textured original flooring.
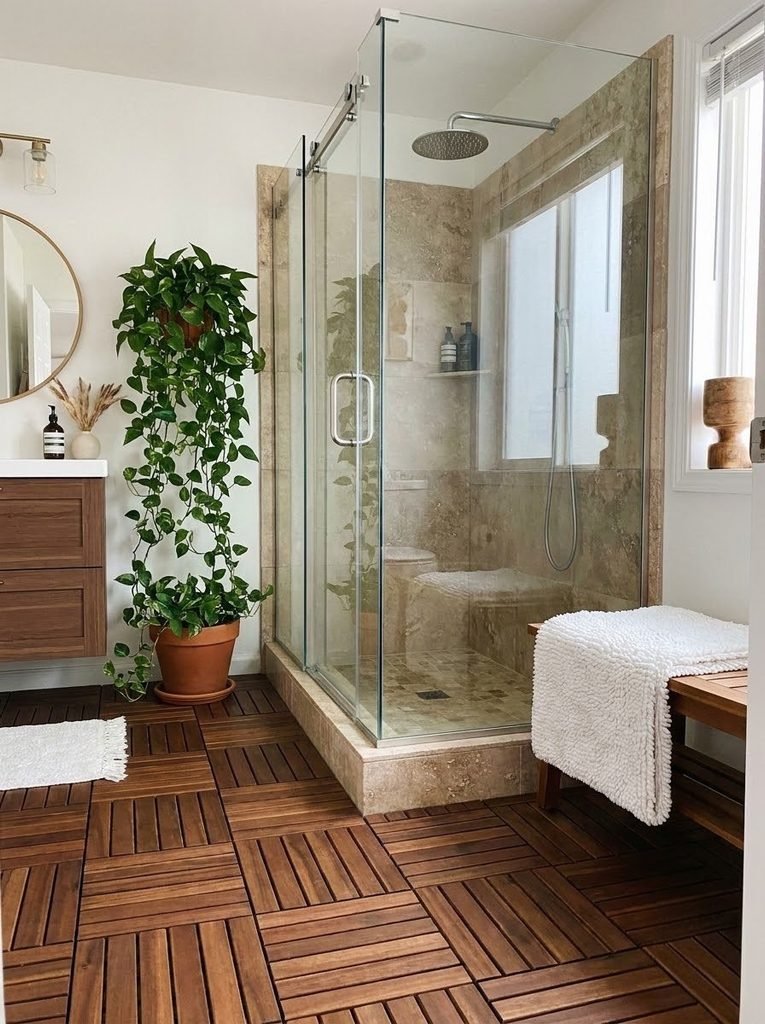
Rich brown interlocking wooden deck tiles covering a bathroom floor for a spa aesthetic.
Managing Moisture and Cleaning
Teak and acacia wood deck tiles are naturally water-resistant, making them ideal for a humid bathroom environment. The slatted design allows water from post-shower drips to pass straight through.
However, because the original floor is still exposed beneath the slats, dust and hair will eventually accumulate underneath. You will need to click a few tiles once a month to vacuum and quickly mop the old floor underneath to keep the room smelling fresh and clean.
Budget-Friendly Alternatives
Real wood deck tiles can be pricey. For a more budget-friendly version of this look, search for composite or heavy-duty plastic deck tiles. They offer the exact same drainage and elevation benefits but at a fraction of the cost, and they can be easily cut with a handsaw to fit around tricky bathroom fixtures.
5. Prep and Protect Your Original Floor
The most common mistake renters make when covering a floor is skipping the preparation phase. Even if you are using a floating floor or the tape hack, trapping dirt, moisture, or mold under a temporary covering for a year or more can cause irreversible damage to the landlord’s property.
Proper preparation ensures that when you finally pack up your boxes, the floor underneath looks exactly the way it did on move-in day.
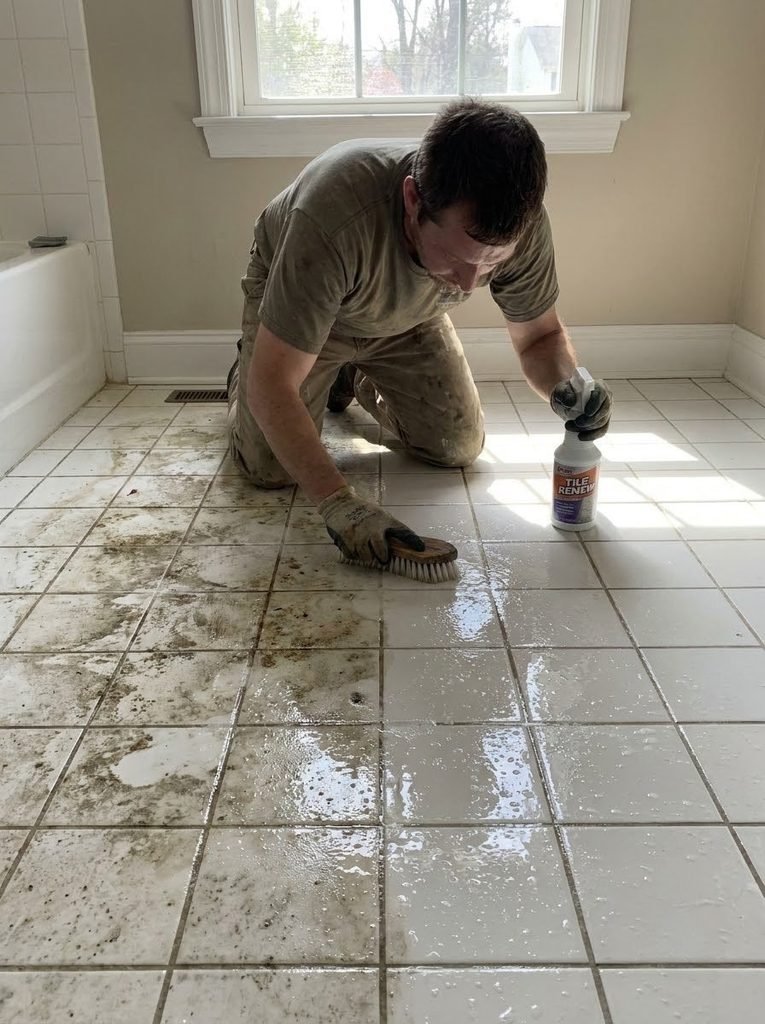
Scrubbing an old bathroom tile floor thoroughly before applying a temporary floor covering.
Deep Cleaning and Drying
Start by aggressively scrubbing the original floor with a degreaser and a grout brush. Any lingering hairspray, soap scum, or mildew will prevent double-sided tape from adhering and can foster bacteria growth in the dark environment under your new floor.
After mopping, dry the floor completely with an old towel. Leave the bathroom exhaust fan running for at least two hours before laying down any tape or vinyl to ensure zero moisture is trapped.
The Move-Out Strategy
When it is time to move out, patience is key. If you used any double-sided tape or stray adhesive, do not yank it up violently. Use a hairdryer on a medium heat setting to gently warm the adhesive, making it soft and pliable. If any sticky residue remains on the original linoleum, use a citrus-based adhesive remover like Goo Gone, let it sit for five minutes, and gently wipe it away with a microfiber cloth.
Frequently Asked Questions
Will peel-and-stick tiles ruin rental linoleum?They absolutely can if applied directly. The adhesive on peel-and-stick tiles is very strong and can tear the top wear-layer off cheap linoleum during removal. Always use a barrier layer like wide painter’s tape or a designated renter’s floor protection paper before sticking them down.
Can mold grow under temporary bathroom flooring?
Yes, if water routinely seeps under the edges of your temporary floor and cannot evaporate, mildew and mold can form. This is why it is crucial to use a bead of removable silicone caulk around the bathtub edge and to wipe up standing puddles quickly.
What is the easiest flooring to cut around a toilet?
Sheet vinyl is the easiest to cut because you can make an exact paper template beforehand and trim it with basic household shears. Thick luxury vinyl planks require more effort, often needing a jigsaw or heavy scoring with a utility knife to navigate the curves.
Do I need my landlord’s permission to put down a floating floor?
Because floating floors (like interlocking planks or deck tiles) use no glue, nails, or permanent fixtures, they fall under standard decor rather than renovation. However, it is always a good practice to read your lease closely. As long as it is fully removed with zero damage upon move-out, landlords generally do not mind.
Wrapping Up Your Rental Bathroom Makeover
You absolutely do not have to accept an unsightly bathroom just because you do not own the property. By choosing the right materials—whether that is a seamless sheet of vinyl, floating interlocking planks, or beautifully slatted wood tiles—you can successfully hide ugly rental bathroom floors in a single weekend. The secret to a perfect DIY always lies in your preparation. Focus on thoroughly cleaning the original surface, utilizing clever tape barriers, and properly sealing your edges against moisture. With a little bit of patience and the right temporary flooring, you can finally enjoy the modern, spa-like bathroom you deserve, all while keeping your security deposit perfectly safe.
Pingback: How to Fix Peeling Peel and Stick Wallpaper (Easy Hacks)